Feeds:
Posts
Comments

Posts Tagged ‘Recipe’

11329971_10204287135927464_8294743859248485176_n

I know its been awhile and as far as content goes this blog has been a desolate waste land over the past few months.  What can I say for myself except for that fact that I have been rather busy these days.  Apparently trying to make my way in the real world has been a bit harder then I had initially thought.  Anyhow I thought I would take a minute to bring everyone up to speed and reaffirm that this blog is not dead.

As usual I have been rather busy doing nothing of an importance or significance besides keeping my head above water.  I suppose sometimes that is all one must strive for.  At the same time there are a few things in the works at the moment and if anyone or a number of them come to fruition I could be styling on a whole new level.  Since all of this is at the grass roots level there is not much more elaboration I am at liberty to offer up at this time.

Besides that I had a few personal issues go down in my life as a direct result of some of my past writings on here.   I held out and stuck to my originally convictions though ultimately the entire ordeal ended in censorship of my own personal words and even the temporary if not permanent removal of a few of my better posts.  This came as quite a blow to my emotions, artistic integrity and pissed me off creatively forcing a short hiatus from writing anything but the surflog, which regrettably has also been altered to my utter dismay.  Despite all of this bullshit I have managed to keep the regular diligent record of my daily surf sessions.

Facemask

This is exactly what censorship boils down to in my opinion…

This was not the first instance where I have had to go back and make some changes due to something I have written that hurt someone I cared about in my life.  All I do is honestly speak my mind about the everyday things that happen in my life.  Of course, since it is my life all of the people in it on occasion find there way into my writing and this would not be a problem other then the fact that what I scribe is available to be read by anyone with an internet connection.  As a blogger for many years being in the eye of the public has been a fact that I was more then willing to except and still am.

At the same time I also have to respect the feelings of those other people in my life and understand their reasons for not wanting to be a part of SurfingRuinedMyLife.net.  Maybe I have finally grown enough as a person over the past few years to finally respect that.  Whether I have made the right decision or not is still to be determined.  What I can say is that it was the right decision for me.  This has always been a surf blog anyhow and I think moving forward I will spend more time writing about surfing instead of just bitching about the melodrama of my some what semi-charmed life I in southern California.

Lets get back to the roots of this blog...Surfing

Lets get back to the roots of this blog…Surfing

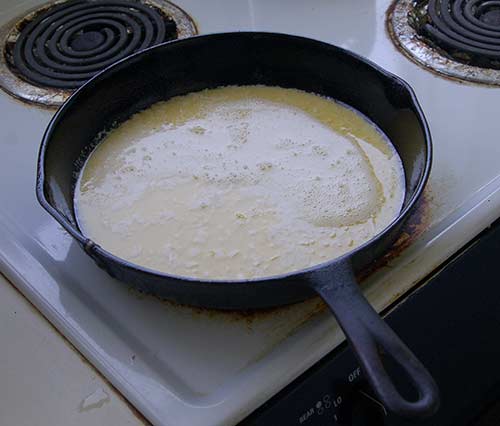
I think less crying and more surfing will suit all of us just fine.  I will of course do a bit of complaining as usual, but we can all agree it is my useless rants that help add a bit of comedy from an other wise boring work.  Expect some new recipes for I am at times cooking again for fun.  As usual there will be new books cause a writer who doesn’t read is like a fish that doesn’t swim.  Hopefully I will have a few other cool things up my sleeve as I search for new inspiration.  I just don’t mean in writing but maybe in life as well.  We all know things here in Santa Barbara have gotten a bit stagnant for me and I feel its time I picked things up.
Ravioli

I have finally managed to surpass my incessant partying with time in the water.  After nearly five years of self destructive party and ten years of self destructive surfing I believe I  have began to find a balance.  I can attribute a lot of this to the many people who have remained constant in my life and even those who exist in it no longer.  Bizarro has helped me find a new vigor for both my cooking and surfing through his new found interest in both. On the Surfing front we have been shooting up a storm.
11333499_1675042429395234_720614452_nI don’t really know what the future holds and wouldn’t want to know anyway or it would not interesting.  I have bit more free time for the next two months and I am hoping to add more content and have a few adventures along the way.  Finally I thank all of you for reading and sharing my life with me at SurfingRuinedMyLife.net.  Here is looking forward to a fun summer.

Read Full Post »

Tell me this doesn't make your taste buds yearn.

Tell me this doesn’t make your taste buds yearn.

How this amazing breakfast/dessert item has eluded  me all of these years is beyond my comprehension.  Apparently the Dutch Baby has been pleasing the breakfast enthusiast for a long time.  I know its been a while since I have posted a recipe up here due my own personal laziness, but I promise my friends it was well worth the wait.  About a month ago Heather told me about this giant oversize pancake she used to eat when she lived in Portland called a Dutch Baby.  After doing some research on the subject I just had to have one.  This past Sunday was the day.

I woke up and was craving a Dutch Baby.  I was lacking a medium size cast iron pan.  Immediately I went on thrift store lurk.  Two thrift shops later and a debate on whether this some what fly pair of chocolate loafers looked good on me and was worth $10 (it wasn’t), I found my pot and was ready to go.  This thing blew my mind and I am sure it will yours as well.  Cook it up for your peers and they will no doubt be giving you praise.  The best part is it is fairly easy and cheap to make too.

Total Cost: $9
Feeds 2-4 people

Ingredient List:

  • Butter – 3 Table Spoons
  • Eggs – 3 (large)
  • Milk – 3/4 Cup (Whole)
  • Flour – 1/2 Cup (All Purpose)
  • Sugar – 1/3 Cup
  • Vanilla Extract – 1 Tea Spoon
  • Cinnamon – pinch
  • Salt – pinch
  • Pepper – 1/2 Tea Spoon
  • Confectionery Sugar – Table Spoon
  • Lemon Juice – Table Spoon
  • Medium Size Cast Iron Skillet (8-10 inch)

Step 1: Preheat Oven –  Preheat Oven to 425 Degrees F and at the same time on a medium flame melt 2 table spoons of butter in a medium size cast iron skillet (8-10 inch) If you do not have a cast iron skillet you can use an 8-10 inch baking pan or sautoir pan.  If you use the sautoir pan be sure to make sure it does not have a plastic handle or it will melt in the oven.

The pan with 2tbs of melted butter

The pan with 2tbs of melted butter

Step 2: Make the Batter – Combine milk, eggs, flour, sugar, cinnamon, salt, pepper, and vanilla extract in a large bowl preferably with an electric mixer.  Beat till foamy.  Pour finished batter into skillet with the melted butter and place into  preheated oven (425F) for around 20 minutes or until Dutch Baby has risen to it’s maximum height and has browned up.

Your batter should be rather runny looking

Your batter should be rather runny looking

Notice the layer of foam settling at the top of the finished batter.

Notice the layer of foam settling at the top of the finished batter.

Step 3: Serve After 20 minutes or so pull out your finished Dutch Baby.  It should have risen rather high and the peaks should have a brown caramelized appearance.  The Baby will fall rather quickly so don’t be alarmed.  Slice up the remaining table spoon of butter and spread it over the top.  Squeeze some lemon juice over the top.  Cover with confectionery sugar.  Fruit topping is optional, add to your own taste.

Your finished Dutch Baby fresh out of the oven sans topping.

Your finished Dutch Baby fresh out of the oven sans topping.

Your final product ready to eat...YUM

Your final product ready to eat…YUM


Read Full Post »

Citrus Torte finished with Marsala Cream...Yum!!!!

Citrus Almond Torte

Yep as you can see I am cooking for pleasure again, well wait I think I need to rephrase that.  I am always cooking for pleasure.  Most days of the week I can’t believe I get paid to cook in the environment I do.  Getting into the food service profession as a career finally has been the best decision I have ever made in my life.  Back to what I mean by cooking for pleasure.  At Westmont I do my best to be as creative and stickler for quality as possible, but given the size of the portioning and ingredients given to work with, plus the time allotted I at times find myself producing a product I am less then proud of.  Still I do the best I can.  

  For a long time I had no one to cook for but myself leaving me severely unmotivated.  Given the clean up and effort I just could not bring myself to do it.  It is for that reason I started having weekly dinner parties here at the Lisanti Palace.  For starters it brings back the grandiose family sit down dinners I grew up accustomed to as a youngster and second it allows me to try out possible recipes for my my restaurant I hope to open someday.  Look for a blog on that really soon.  

These dinners have allowed me to try out all sorts of items, from entree’s to appetizers to sides to even dessert.  Some of the recipes are family secrets and I wont give them here.   Others I have taken from different sources and tweaked them to my liking.  Those are the ones I will post here on SurfingRuinedMyLife.net.  Please don’t feel disgruntled and instead respect the integrity of recipes passed down through my family from Naples, Italy for generations for as long as anyone in my family can remember. 

I know the last five recipes or so have been desserts, but that is an area that has always been weak for me and one I am slowly getting a handle on.  Also the dessert category of Recipe D’Jour was lacking and I wanted to beef it up before the eventual redesign I am working on for this entire blog (that too is another blog for another day).  This Citrus Almond Torte is one that is rather simple to create, wont break your bank and can be made in a reasonable amount of time.  Did I mention it is rather tasty as well. 

Serving Size: 8-10
Total Cost: $11.50
Prep Time: 35mins
Cook Time: 45mins
Cool Time: 1hr 30mins

Ingredient List:

  • Torte
    • Butter – 4oz (room temperature)
    • Sugar – 3/4 Cup
    • Large Egg – 1
    • Egg Yolk – 2
    • Almonds – 1 cup (toasted, ground)
    • All Purpose Flour – 1/2 Cup
    • Orange Juice – 2 Table Spoons
    • Lemon Juice – 2 Table Spoons
    • Orange Zest – 1 Table Spoon
    • Lemon Zest – 1 Table Spoon
    • Coriander – 1 Tea Spoon
    • Salt – Pinch
    • Egg Whites – 2
  • Marsala Cream
    • Chilled Whipping Cream – 1 Cup
    • Confectionery Sugar – 2 Table Spoons
    • Marsala Wine – 2 Table Spoons
  • Orange Sauce
    • Orange Juice – 1 Cup
    • Corn Starch – 1 1/2 Table Spoons
    • Sugar – 1/4 Cup
    • Orange Zest – 1 Table Spoon

Step 1: Get Your Ingredients for the Torte Together – Take two eggs and separate the yolks from the whites, you will need both parts at different times so do not throw away either.  Zest both your lemon and orange.  Use actual fruit for your juices needed.   Whip egg whites till stiff but not dry, make sure if your using an electric mixer beater is clean.  Preheat oven to 375 F.  Butter and lightly dust with flour an 8inch springform pan.

Step 2: Mix Ingredients – Beat butter in a large bowl until fluffy.  Cut the butter into small manageable pieces to make process easier.  Gradually add sugar till blended. Add the whole egg, then the yolks one at a time beating well after each addition.  At low speed beat in almonds, flour, orange juice, lemon juice, lemon zest, orange zest, coriander and salt.  Be sure to scrape down bowl as many times as necessary in order to have a conform mixture.  Fold egg whites into batter in two equal parts.

The finished batter.

Step 3: Bake in Oven – Pour batter into your springform pan, place in oven preheated to 375F for 40 minutes or until you can put a tooth pick inside its center and it comes out clean.  Cool at room temperature for an hour and a half.

Torte after coming out of the oven.

Step 4: Make Marsala Cream – Beat whipping cream and confectionery sugar till soft peaks form.  Mix in Marsala. Refrigerate if holding

Step 5: Make Orange Sauce – Whisk orange juice and cornstarch in bowl till cornstarch is completely dissolved.  Melt butter in heavy sauce pan over medium flame.  Whisk in sugar, orange zest and orange juice cornstarch mixture.  Whisk until sauce boils and thickens, should take around five minutes.  Remove from flame and cool.  Refrigerate if holding more then a few hours.

Step 6: Serving Options – When serving this Citrus Torte you have several options.  First and the simplest way is to cover the top of the torte with powdered sugar and then if desired serve either the Marsala Cream or Orange Sauce or both on the side.  Second you can use the Orange Sauce as the topping of the Torte.  To do this just drizzle entire Torte in Sauce till you get the desired covering (pictured below).  Finally you can use the Marsala Cream to actually Ice the Torte as shown in the opening picture and then serve the orange sauce on the side or if you are plating it by the slice I like to drizzle the sauce over the middle of the slice after it has been placed on its side.

Torte Served with just the Orange Sauce.


Read Full Post »

mmmm...waffles

mmmmmmm....waffles....Almond Flour Waffles!!!!

I love waffles, I mean who doesnt?  I will tell you who, my old roommate Brennan didn’t.  Apparently he was eating waffles when he found out his grandmother died as a little kid and has not eaten them since.  Talk about bad associations. I feel the same way about pecan pie.  On a family vacation to Virginia Beach on our last night my parents got this pecan pie from Denny’s. Now, I love Denny’s as far as cheap eats go and a nostalgic Jersey dinner feel you cant go wrong.  I dont know what happen with this particular pie, but all I know is the whole drive back to NJ I was vomiting and spitting out my asshole.

I dont know if you can blame the pie since no one else in my family got sick, quite frankly I most likely ate too much of the damn thing.  Anyway enough with bad food experiences and on to good ones.  Isnt this a great way to start out a blog for a recipe to cook?  These Almond Flour Waffles are absolutely scrumptious and they are gluten free.  These days gluten has become the enemy of human existence  even though we have been eating for over 300 years. They are tasty, fun and easy to make.

Total Cost: $9.75
Feeds About three people, two waffles per person

Ingredient List:

  • Almond Flour – 2 cups
  • Eggs – 6
  • Salt – 1/2 teaspoon
  • Cinnamon – 3/4 teaspoon
  • Baking Soda – 1/2 teaspoon
  • Vanilla – 1 1/2 teaspoons
  • Honey – 3 tablespoons

Step 1: Mix IngredientsIn a large bowl whisk together all ingredients.  It helps to do all the wet ingredients first and then add the dry ones.  Whisk till you have a nice batter

Ingredients pre-mixing.

Your finished batter

Step 2: Add Batter to Waffle IronPreheat waffle iron till it is hot.  Pour enough batter into iron to make one waffle, I would say fill the tray about 3/4 of the way.  These waffles grow well.

Step 3: Add ToppingsUse syrup, fruit, powdered sugar, butter, chopped almonds or whatever floats your boat and enjoy.

Read Full Post »

Chicken Marsala

Chicken Marsala was a dish that my dad always used to order when we went to Italian restaurants.  I never really had a taste for it up until a few years ago.  Marsala being a Sicilian dish it was not one of the recipes brought over to America by my grandmother thus no one in my family ever cooked it.  I did some researching of different recipes and put together my own that I find to be rather tasty, easy and as always well within the nuts and bolts budget most of us live on.

Total Cost: $10.51

Feeds 2-4 people, 1 breast for two people so add breasts accordingly

Ingredient List:

  • Chicken Breast – 2 (halved and thinned)
  • Pasta of Choice (spaghetti pictured) – 1 lb
  • Cremini or White Musrooms – 8 oz (around 10) (Chopped)
  • Marsala Wine – ½ Cup
  • Sherry – ¼ Cup
  • Flour – ¼ Cup
  • Salt – 1 Teaspoon
  • Pepper – ½ Teaspoon
  • Garlic – 1 Clove (Minced)
  • Oregano – 1 Teaspoon (Dry)
  • Butter – 4 Tablespoons
  • Olive Oil  – 4 Tablespoons
  • Green Onion – 4oz (Chopped)
  • Creamy Marsala Sauce
    • Cremini or White Mushrooms – ½ Cup (about 6)(Chopped)
    • Green Onion – ¼ Cup (Chopped)
    • Marsala Wine – 1/3 Cup
    • Salt – 1 Teaspoon
    • Pepper – ½ Teaspoon
    • Oregano – ½ Teaspoon
    • Heavy Cream – 1/3 Cup
    • Milk – 1/8 Cup
    • Butter – 2 Tablespoons

Step 1: Prep ChickenCut chicken breasts in half long ways through the center of breast so that you are left with two thin cutlets.  Beat each piece with a tenderizer.  Take flour, ¼ of a cup or enough to cover each cutlet and pour into a mixing bowl.  Add 1 teaspoon of salt, ½ teaspoon of pepper and 1 teaspoon of oregano and whisk together.  Pat chicken in this mixture till it is completely covered.


Step 2: Chop Vegetables and Cook Pasta Chop all mushrooms and green onions, mince garlic.  Boil water for pasta and cook it.


Step 3: Make Creamy Marsala SauceIn a small sauce pot melt 2 table spoons of butter.  When melted add 1/3 cup of heavy cream, 1/8 cup of milk, mushrooms, salt, pepper, oregano and Marsala wine.   Bring to a boil, then reduce heat and let simmer around twenty minutes.  Add green onions.  After that create a roux to thicken sauce using 1/8 the amount of roux to sauce.  Melt about ¼ of a tablespoon of butter in a separate saucepot.  When melted add an equal amount of flour to it.  Mix together and cook on high flame till you get a brownish blob looking substance.  Pour half of your Marsala sauce into this pot with the roux and stir till both are well blended then pour back into the main Marsala sauce pot, stir well and let simmer on a low flame for five minutes.  Turn off heat and let sauce stand another five minutes and sauce should thicken up nicely.

Your finished sauce


Step 4: Fry ChickenIn a large frying pan melt 4 tablespoons of butter in 4 tablespoons of Olive Oil.  When completely dissolved add chicken and cook both sides till golden brown or 165 degrees F.  Add mushrooms, sherry and Marsala Wine, Sautee till mushrooms are soft.  Add green onion.

Your chicken in the cooking process with all ingredients added

Step 5: Put it all togetherTake finished pasta and put it into a plate.  Put finished Chicken breast and mushrooms on top of pasta.  Pour sauce over all and enjoy!


Read Full Post »

Cornish Hen ready for the eating…mmmm citrus!

Creating a Tasty Citrus Brine

This weeks Recipe D’Jour I am going to enlighten you on how to create a very tasty citrus Brine Marinade that goes great with all poultry and pork.  First off a brine is a water based mixture that contains two parts sugar to one part salt.  By using a brine you will have a scrumptious marinade that will spice up any dinner.  There all types of brines but for today’s purposes we are going to focus on a citrus brine.

Total Cost/Feeds: Depends on what your going to brine

  • Turkey – $22, feeds 8-10 people with sides
  • Chicken – $14, feeds 4-6 people with sides
  • Pork Lion – $10, feeds 4-6 people with sides
  • Cornish Hen –  $8, feeds two people with sides

Ingredient List: (use the proportions on this recipe and increase as needed to the size of the meat you plan to brine.  Keep in mind that the meat should be completely submerged in the brine.  This recipe makes about a gallon of brine.)

  • Meat to Brine
  • Salt – 1 1/2 cups
  • Sugar – 1 cup
  • Water – 1 gallon
  • Pepper – 1 teaspoon
  • Oregano – 1 teaspoon
  • Basil – 1 teaspoon
  • Thyme – 4 oz (Fresh)
  • Sage – ½ teaspoon (Dry)
  • Orange – 2
  • Lemon – 3
  • Lime – 1
  • Lemon Herb Seasoning or Lemon Zest
  • Parsley – 3 oz (Minced)

Step 1: Create a brineIn a large container big enough to completely cover your meat combine 2 parts sugar to one part salt in water.  Stir well.  Should taste like a sugary salt water.  It will taste rather gross but should taste more sweet then salty.  I have four cups to two but you may want to adjust according to taste and size of meat you are going to marinade.  Obviously it has to be proportional to the water and you are going use more water with a turkey then a Cornish hen.

Step 2: Marinate MeatIn the container from step1 add Thyme, lemons, lime and oranges.  Be sure to cut fruit in half and squeeze juice into brine after which insert the left post-squeezed fruit as well.  Whisk till it is mixed.  Then add meat you wish to marinade and let sit in refrigerator for 8-12 hours.

A Pork Roast in the Marinade process.

Step 4: Dry Rub MeatRemove meat from marinade and place in a baking pan.  In a bowl add spices, Salt, Pepper, Oregano, Basil, Sage, Lemon zest (which you can get off the left over lemon ends from the brine) and parsley or you can buy a prefabricated lemon and herb seasoning.  Pour over meat in pan and rub around in it till completely covered in spices.  Put about a quarter of an inch of Brine in baking pan with meat to keep it moist and help to absorb more flavor.

Step 5: Bake – Preheat oven to 350 degrees F and bake for whatever the proper amount of time for what you are cooking.  Chicken, a little over an hour, pork loin about the same, hens just under an hour, turkey about two and half hours.

Read Full Post »

Ginger Bread – How to build your very own Ghetto Fabulous Ginger Bread Abode.

It can’t be Christmas with out the construction of a ginger bread house.  There is nothing I find more enjoyable about the holiday season then spending a few good hours in an attempt to build a beautiful confectionary structure that ends up coming out like a run down shanty.  But its my ginger bread shanty and that is all that matters.  No matter how ugly it looks it tastes delicious.  Ginger bread can also be used for cookies as well. Follow this recipe and all your ginger bread hopes and dreams will be realized.

Total Cost – $10.85
Feeds 4-6 people

Ingredient List:

  • Dark Brown Sugar – 1/3 Cup
  • Vegetable Oil – ½ Cup
  • Egg – 1
  • Molasses – 2/3 Cup
  • Ginger – 1 Teaspoon (Ground)
  • Salt – ½ Teaspoon
  • Baking Powder – 3 Teaspoons
  • Flour  – 3 ½ Cups
  • Assorted Candy
  • No stick baking spray
  • Frosting
    • Shortening – ½ Cup
    • Powdered Sugar – 20 oz
    • Salt – Pinch
    • Vanilla Extract – 1 Table Spoon
    • Milk – 1/3 Cup


Step 1: Mix Ginger Bread BatterIn a large mixing bowl combine Dark Brown Sugar, Vegetable Oil, Egg, Molasses, Ginger, Salt, Baking Powder, Flour till you have a dough like consistency.  When well blended it should be dark brown.

This is the color and consistency your finished dough should have.

Step 2: Spread Dough in to baking panPreheat oven to 350 Degrees F.  Spray non-stick baking spray in baking pan 9” x 13”.  Spread dough evenly through out.  For cookies you should flatten your dough to be around ½” for a house 1/3”.  This recipe will be enough ginger bread for a small house, double or triple depending on size of structure you wish to create.  If you are going to make your cookies from cutouts be sure to cut shapes prior to baking.  The same goes for intricate house projects. If you are building a standard house like I do then you can do your cut outs after baking although I still find doing it before is easier.

Step 3: Bake Ginger BreadPlace pan into the oven and bake for 10 minutes for cookies, 13-15 minutes for a house.  For cookies you should have a soft feel to your ginger break for house it should be rather hard.

Step 4: Make FrostingFrosting is not only for making faux snow decoration but is also the mortar that holds your house together.  It will be the decoration for your cookies as well.  In a large mixing bowl combine all dry ingredients (powdered sugar, salt) and mix with shortening.  Cube up shortening prior to adding to mixture.  Mix till you have formed little balls with both sugar and shortening.  Add Vanilla Extract and slowly add milk till you have an icing consistency.  Blend with electric mixer if possible or elbow power will do as well.

Your finished icing.

Step 5: Build and Decorate Your House/CookiesIf your just doing cookies then your pretty much done here.  Use the frosting and your pick of candy and decorate the heck out of them.  If your doing a house your work has just begun.  Take a piece of cardboard an adequate size to accommodate your house and cover it with aluminum foil.  This will be the property for your home.


Next get your pieces in order.  It is very important to use some type of pattern for both your roof and house pieces to make sure it comes out even otherwise you will end up with a crooked house.  You pieces depend on the house you intend to build.  For a basic house you will need two isosceles triangles for the roofline and two rectangles for the roof top.  Then another two rectangles for the sides of the house and two squares for the front and back.  Its best to figure out some type of scale before starting.  This is if you want perfection, but if your impetuous like myself you can just wing it and see what happens.  I find this makes some of the most comical houses.  Use the icing to hold your pieces together and glue your house to the cardboard.  The icing will also hold your candy to the house as well.

A small house circa 2004

A Ginger Bread Monstrosity circa 2005

Small house with a Tree shaped cookie

Read Full Post »

French Toast

Mmmmmmmm….French toast and even better breakfast.  For the longest time I was not a fan of hot breakfast.  During a period of about eight years I ate nothing but cold cereal every morning or oatmeal. Over the last few years I have come to love a nice hot cooked breakfast making it one of my favorite meals of the day.  French toast is one of my specialties and is sure to please the pickiest of eaters.


Total Cost: $5.85
Feeds about 4 people

Ingredient List:

  • Thick Yellow Slice Bread – 8 slices
  • Eggs – 6 (Beaten)
  • Milk – ¼ Cup
  • Cinnamon – 1 teaspoon
  • Sugar – ½ teaspoon
  • Nutmeg  – pinch
  • Vanilla – ½ teaspoon
  • Confectionary Sugar – as desired
  • Butter – ½ stick
  • Black Pepper – pinch
  • Salt – pinch


Step 1: Mix the batter – Combine the eggs, milk, cinnamon, sugar, nutmeg, vanilla, salt, pepper and whisk till a uniform conformity.


Step 2: Fry the Bread – In a frying pan preferably large enough to fry two slices at a time melt butter.  When fully dissolved dip both sides of bread into batter till properly covered.  Place in pan and fry each side for a 1-2 minutes till its cooked.  You don’t want to burn your bread so be watchful of it.


Step 3: Serve – Cut bread on an angle for a chic restaurant finish, pour syrup over the top and sprinkle confectionary sugar on top for flare.


Read Full Post »

Tilapia in a Lemon Dill Sauce
With Brown Rice Risotto In a Garlic Basil Sauce and a Baked Potato

Tilapia is the poor man’s fish and myself being a poor man on occasion will resort to this thrift of the sea.  At 2.99lb you cant go wrong.  By itself tilapia is a far from a tasty fish but accompanied with this Lemon Dill Sauce it is rather scrumptious.  You know a cut of tilapia to the untrained eye looks a bit like cat fish so one could fool unknowing guests and they will think pure elegance while eating smut.

Cost: 8.75 including sides
Feeds about four people


Ingredient List:

  • Tilapia – 4 4oz pieces
  • Lemon Juice – 1 cup
  • Dill Leaves – 2oz (Dry)
  • Olive Oil – 3 Table spoons
  • Garlic – 1 ½ Clove (minced)
  • Salt  – 2 Tea Spoons
  • Pepper – 2 Tea Spoons
  • Butter – 8 oz
  • Corn Starch – 4 oz


Step 1: Marinate Tilapia – In a small mixing bowl combine ¼ cup of Lemon Juice and/or squeezed lemons, ½ table spoon of Dill Leaves, 1 table spoon of Olive Oil, ½ clove of Garlic, Salt, Pepper and stir together.  Lay tilapia pieces in a baking pan large enough to accommodate and pour contents of mixing bowl over pieces making sure to cover both sides. Bake in oven at 350 for around ten to fifteen minutes.


Step 2: Make Lemon Dill Sauce – In a small saucepot melt butter (8oz).  When melted combine Lemon Juice (1/2 cup) , Dill Leaves (2 oz), Olive Oil (2 table spoons), Garlic (1 clove), Salt (1 teaspoon), Pepper (1 teaspoon) and bring to a boil.  Let boil for three minutes and stir constantly


Step 3: Create a Slurry To Thicken Sauce – Bring down the flame to low. Take 4 oz of cornstarch and put it in just enough cool water to dissolve it.  When corn starch is dissolved stir it into sauce.  Turn off heat and stir.  As sauce cools it will get thicker as a result of the slurry.

Step 4: Serve – Pour sauce over cooked Tilapia.


Sides:

Baked Potato: Take a russet potato and wash it.  Bake in preheated oven 375 F for around 45 minutes till soft.

Brown Rice Risotto in a Garlic Basil Sauce

Your finished fish.

Read Full Post »

Shrimp In a Coconut Curry Over Egg Noodles

This is a bit of Thai or Malaysian cuisine and something I sort of borrowed from the college kitchen making some minor embellishments.  It makes for a very unique and elegant meal sure to empress both the eye and taste buds.  This one is definitely a bit on the expensive side.  If your on a tight budget leave out the pine nuts and okra.


Total Cost: 16.18
Feeds about 4 people

Ingredient List:

  • Shrimp – 1lb
  • Coconut Milk – 14 oz
  • Coconut – 1/3 Cup (Shredded)
  • Salt – Tablespoon
  • Pepper – Teaspoon
  • Garlic – 3oz (minced)
  • Bay Leaves – Teaspoon (Dry, minced)
  • Bamboo Shoots – 8oz (Chopped)
  • Thyme  – Teaspoon
  • Egg Noodles – 1lb
  • Peas – 15 oz
  • Leeks – 4 oz
  • Okra – 12 oz
  • Pine Nuts – 6 oz (roasted)
  • Thai basil – ½ cup, Fresh (Chopped)
  • Chili – 1 dry (minced)
  • Ginger – 1 tablespoon (minced)
  • Olive Oil – 1 tablespoon
  • Butter – ½ tablespoon


Step 1: Cook Egg Noodles – In a large boiling pot bring water to a boil and add Egg noodles.  Stir occasionally.  Let boil for around 12-15 minutes or until noodles are soft.


Step 2: Boil Coconut Milk – Pour Coconut milk into a small sauce pot and bring to a boil.


Step 3: Cook the Shrimp – In a wok (or large frying pan) melt ½ a tablespoon of butter with 1 tablespoon of Olive Oil.  When completely dissolved add shrimp, ginger, Thai Basil, Chili, Okra, Pine nuts, Leeks, Thyme, Salt, Pepper, Peas, Bamboo Shoots and Bay Leaves.  Sauté for around ten minutes, stir constantly. Then add coconut milk and let simmer for another ten minutes.  Stir in shredded coconut.


Step 4: Put It All Together – Put egg noodles in plate and pour Shrimp and Vegetable mixture over it.  Sprinkle some shredded coconut on top and enjoy!


Read Full Post »

Older Posts »